Alcohol Gas Sensor ( MQ-3 ) SEN42 ,R16
This alcohool sensor is suitable for detecting alcohol concentration on your breath, just like your common breathalyzer.
Getting started with Alcohol Gas Sensor ( MQ-3 )
In this project, we will go over how to build an alcohol sensor with an arduino.
The alcohol sensor we will use is the MQ-3 sensor. This is a sensor that is not only sensitive to alcohol, particularly ethanol, which is the type of alcohol which is found in wine, beer, and liquor.
This type of sensor circuit can be used as a breathalyzer to check a person’s blood alcohol level. Just as we exhale carbon dioxide when we breathe out, we also will breathe out some alcohol if we have alcohol in our blood. Any alcometer device can measure this alcohol content.
The more ethanol in your blood, the more there is in the air on exhalation. This alcohol content gives a good indication for if a person is drunk and how drunk they are.
The amount of alcohol exhaled into the air is proportional to the amount of alcohol which will be found in a person’s blood. Alcometers use a built-in formula to estimate blood alcohol content from exhaled air alcohol content.
For different countries, the level of alcohol in the blood that defines a person as over the limit for driving varies. The range ranges from 0.01 to 0.10. Most countries have a limit of about 0.05. For example, Greece, Greenalnd, and Iceland all have limits of 0.05. Canada has a higher limit set at 0.08. In the United States, it is also 0.08. This means that if the alcometer reading measures above this, the person can receive a DUI
For our circuit, it can function as an alcometer so that we get an estimate of a person’s blood alcohol level.
Disclaimer: You don’t have to drink alcohol in order to test this sensor. Mouthwash, such as Listerine, contains alcohol. If you gargle mouthwash for a few seconds and then breathe into the sensor, the readings should jump and register. This is all that’s needed to test. I take no responsibility for any drunkenness.
Hardware required
- MQ-3 alcohol sensor
- Arduino uno
- Jumper
- LED
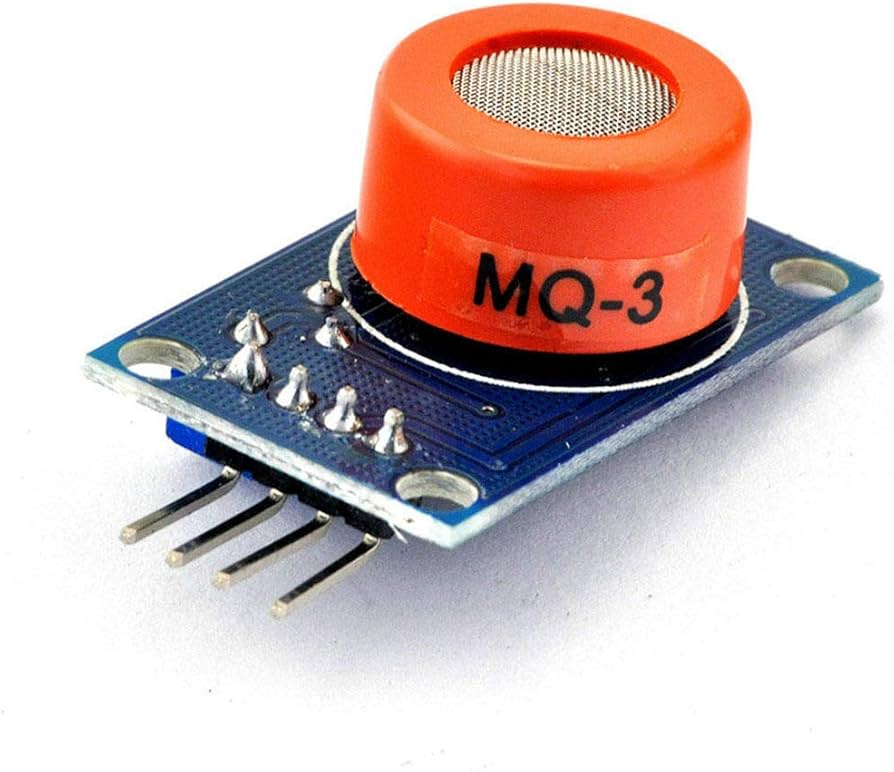
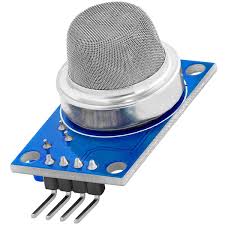
MQ-3
There are 4 leads which need to be connected. The +5V and GND leads establishes power for the alcohol sensor.
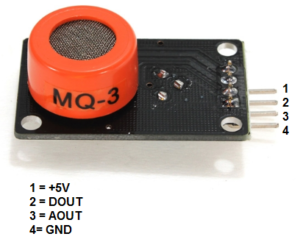
The other 2 leads are AOUT (analog output) and DOUT (digital output). How the sensor works is the terminal AOUT gives an analog voltage output in proportion to the amount of alcohol the sensor detects. The more alcohol it detects, the greater the analog voltage it will output. Conversely, the less alcohol it detects, the less analog voltage it will output. If the analog voltage reaches a certain threshold, it will send the digital pin DOUT high. Once this DOUT pin goes high, the arduino will detect this and will trigger the LED to turn on, signaling that the alcohol threshold has been reached and is now over the limit. How you can change this threshold level is by adjusting the potentiometer to either raise or lower the level.
Connecting the Hardware
The alcohol sensor circuit we will build with an MQ-3 sensor integrated with an arduino is shown below.
To connect the sensor, there are 4 leads. 2 of them are for power. The +5V terminal of the sensor connects into the 5V terminal of the arduino board. The GND terminal of the sensor connects into the GND terminal of the arduino. This establishes power for the sensor.
The other 2 connections are the analog and digital output of the sensor. These connect to analog pin A0 and digital pin D8, respectively
Code
The code which we need to upload to the arduino so that it can measure alcohol levels is shown below.
const int AOUTpin=0;//the AOUT pin of the alcohol sensor goes into analog pin A0 of the arduino
const int DOUTpin=8;//the DOUT pin of the alcohol sensor goes into digital pin D8 of the arduino
const int ledPin=13;//the anode of the LED connects to digital pin D13 of the arduino

int limit;
int value;

void setup() {
Serial.begin(115200);//sets the baud rate
pinMode(DOUTpin, INPUT);//sets the pin as an input to the arduino
pinMode(ledPin, OUTPUT);//sets the pin as an output of the arduino
}

void loop()
{
value= analogRead(AOUTpin);//reads the analaog value from the alcohol sensor’s AOUT pin
limit= digitalRead(DOUTpin);//reads the digital value from the alcohol sensor’s DOUT pin
Serial.print("\nAlcohol value: ");
Serial.println(value);//prints the alcohol value
Serial.print("Limit: ");
Serial.print(limit);//prints the limit reached as either LOW or HIGH (above or underneath)
delay(100);
if (limit == HIGH){
digitalWrite(ledPin, LOW);//if limit has been reached, LED turns on as status indicator
}
else{
digitalWrite(ledPin, HIGH);//if threshold not reached, LED remains off
}
}
The first block of code defines all the pin connections of the sensor and the LED. Since the AOUT pin connects to analog pin A0, it is initialized to 0. Since the DOUTpin connects to digital pin D8, it is initialized to 8. Since the LED connects to digital pin D13, it is initialized to 13. 2 variables, limit and value, are also declared. These will be used to store the value of the analog pin AOUT and digital pin DOUT.
The next block of code sets the baud rate and declares the DOUTpin as input and the ledPin as output. This is because the sensor is an input to the arduino for the arduino to read and process the sensor value. And the LED is an output will serves an indicator if the sensor has detected alcohol.
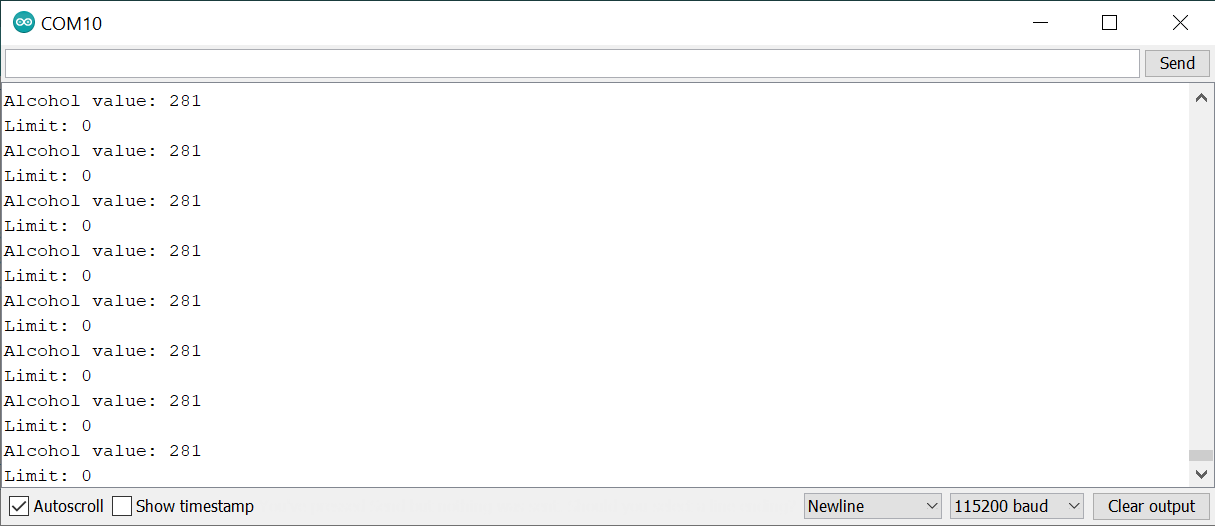
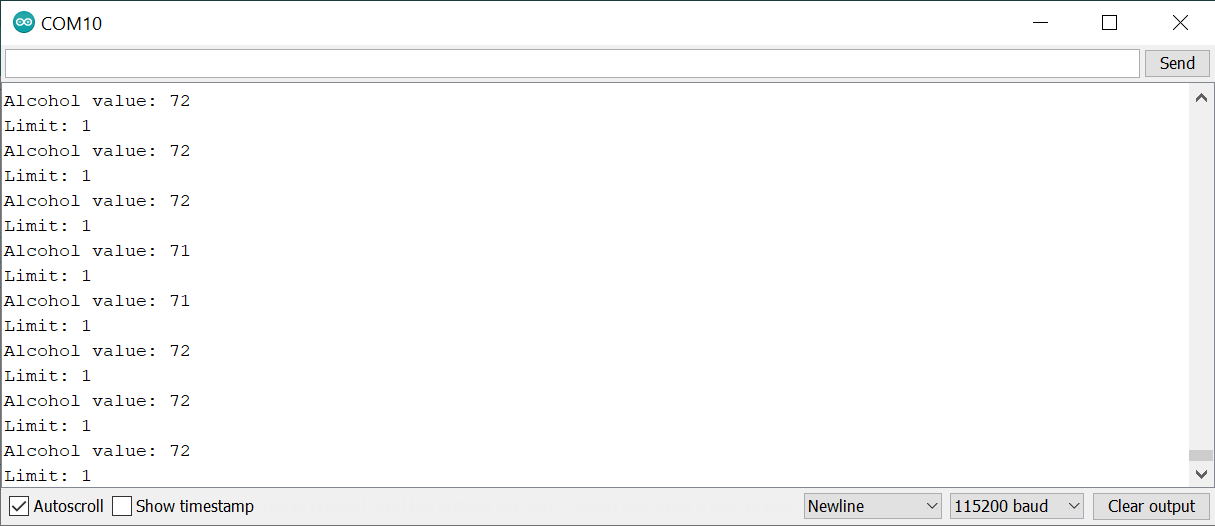
The next block of code reads the sensor pin AOUT and stores the value in the integer value. It also reads the sensor pin DOUT and stores the value in the integer limit. We then print the alcohol value, which will be a numeric value ranging from either 0 (no alcohol detected) to 1023 (maximum level of alcohol that can be read). We will aslo print the limit which will either be HIGH or LOW. If the alcohol detected is under the threshold level, the value of limit returned will be low. If the alcohol detected is above the threshold, the value of limit returned will be HIGH.
If the value is HIGH, the LED will turn on. If the value is low, the LED will remain off.
Applied to Gas
Frw 6,000






.jpeg)
