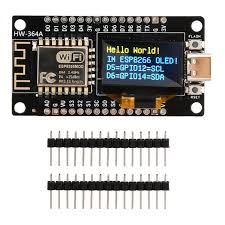
NodeMCU ESP8266 Development Board with 0.96 Inch OLED Display, CH340 Driver Module for Arduino IDE/M
Description
This circuit board integrates the ESP8266 NodeMCU and 0.96-inch OLED screen, providing all the functions of traditional ESP8266 modules, with the same size and peripheral ports, as well as higher performance development tools and high-definition data display. It supports multiple programming modes and has an ESP8266 chip with an 80MHz main frequency and 4MB flash memory, making it easy to handle various tasks and applications, as well as a complete network protocol stack and security mechanism. It has low power consumption and high performance, making it suitable for beginners and professionals to develop and apply IoT projects.
Features
- All-in-One Design
- Hassle-Free Integration
- Versatile Display
- High-Resolution Display (128×64)
- USB-C interface for your projects connectable
Specifications
Nodemcu
- Working Voltage: 3.3V
- Input Voltage: 7-12V
- Digital I/O Pins: 16
- Analog Input Pin: 1
- UART: 1
- SPI: 1
- I2Cs: 1
- Driver: CH340G
- Flash Memory: 4 MB
- SRAM: 64 KB
- Clock Speed: 80 MHZ
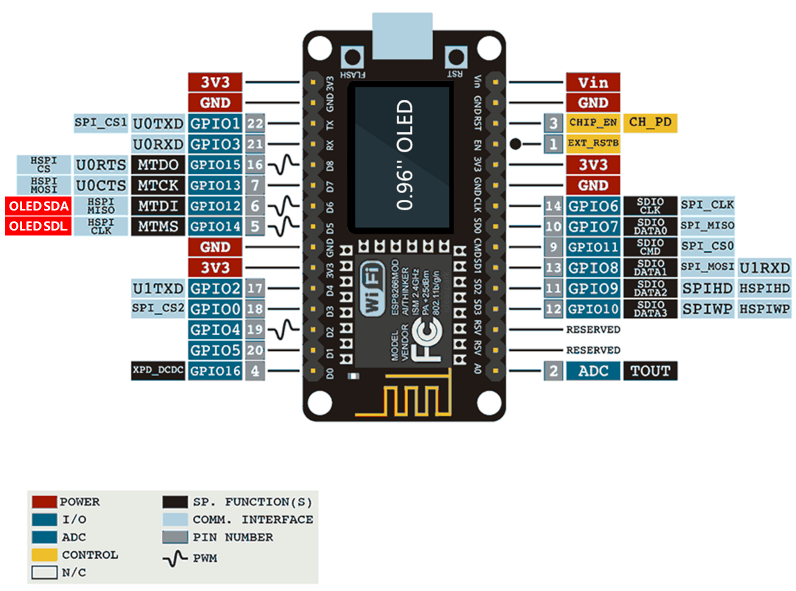
ESP8266 and OLED Port Mapping
ESP8266 ———- 0.96” OLED
VCC(3.3V) ———- VCC
GND —————- GND
D6(GPIO12) ——– SDA
D5(GPIO14) ——– SCL
Getting started with NodeMCU ESP8266 with 0.96 Inch OLED Display
Let’s first take a look at the pinout of the device
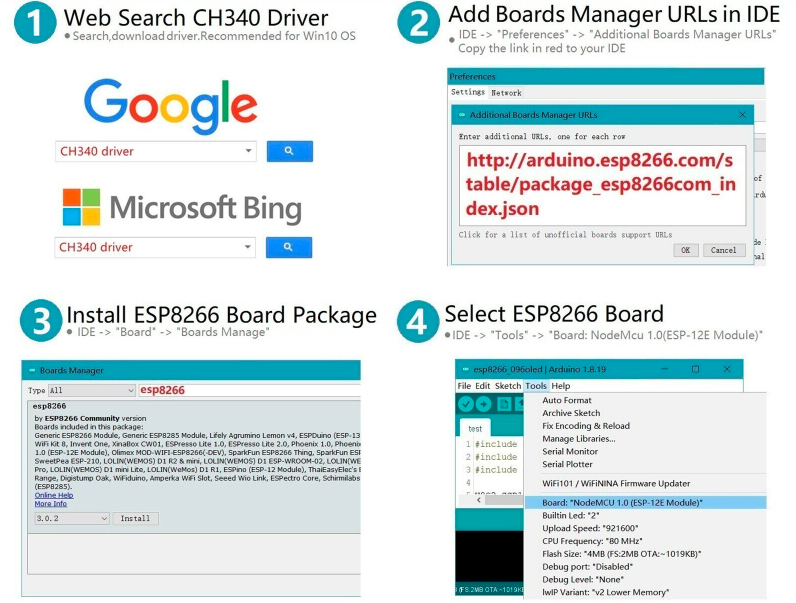
Now we upload a sample code to check if our board is safe and sound, since the only difference from the usual NodeMCU ESP8266 things are gonna be just easy. No complications. As the following picture illustrates, you have first to download the board index of Nodemcu ESP8266 and the supporting driver for it in order to interface it with your computer arduino IDE
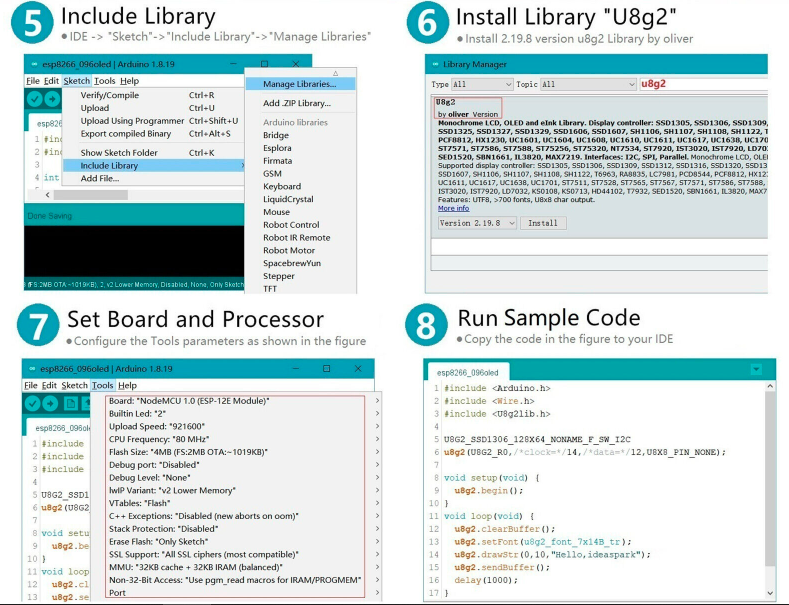
Next you install the library for the OLED attached on the Nodemcu to be able to print whatever you like on it. So follow the steps in the picture below
Frw 14,000






.jpeg)
